Although the steps for refilling HP 88 and 940 tank cartridges vary a little from the normal drill, prep, fill, and test routine, it is basically the same. There will be only three new steps. Here are simple and easy to use instructions for all operators to learn how to refill these cartridges.
For refilling these tank cartridges you will need to have several tools or supplies handy. The items below should come in your initial 88/940 kit. They are:
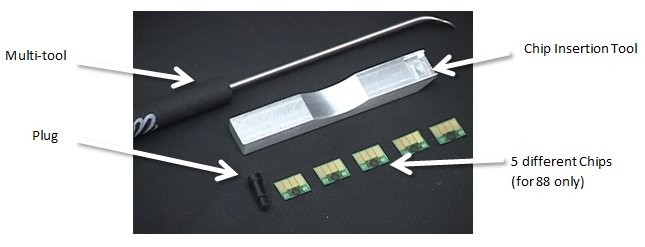
Step 1: The first step depends on whether you are refilling the cartridge for the first time or one that has been re-filled before by our RIS process. For repeat fills replace the black plug with a new one and go to step three.
For First Time Refills:
Using the multi-tool, lay the cartridge down on the work surface, label name up. You will use the multi-tool to cut the label across the seam between the cap and body of the cartridge as shown in the picture below.
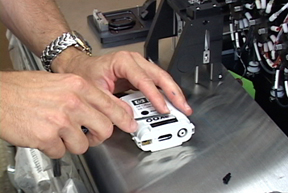
You will then flip the top of the cartridge up or open to reveal the fill port. See the picture below. The paper label on the opposite side of the cartridge will likely still be connected and will act as a hinge. This is a good thing, leave it connected
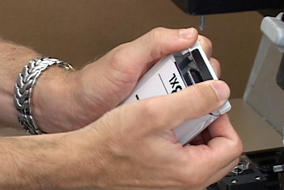
Step 2: The fill port has a rubber plug(ball) inside that will need to be removed. Remove it with the multi-tool. Use the sharp point of the multi-tool to dig down into the plug and stab the small ball. Use a twisting/scooping motion to extract the ball. Dispose of the it. This technique is shown in the three images below. Now the port needs to be filled with a new plug. This plug we call the HP 88/940 plug. Place the plug into the hole.

Take care to not break the three plastic ribs at the mouth of the fill port. It is normal for the plug to stick up a bit.

Step 3: Place the cartridge into the refill adapter (HP T-3). Do this by turning the cartridge around with the part number (88 or 940) away from you and the open lid toward you. The guides on the inside of the adapter will line up with a small fin on each side of the tank cartridge. Bring it in and line it up. As you do that you will see the towers on each side of the adapter begin to rise. The cartridge will snap into position. See picture below
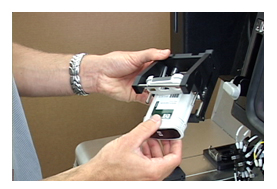
Step 4: Login the cartridge in the normal way. Notice the ID tag goes directly to the fill queue. Highlight the ID tag and place the cartridge/adapter assembly into the fill chamber. Place the correct color injector into the fill port which is now on the left side. Close the chamber door to begin the fill process.
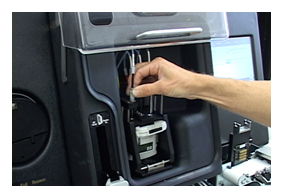
Step 5: The HP 88 or 940 cartridges need to be primed to work correctly in the customers printer. When the refill process is complete, open the chamber door and move the injector from the left side to the right side port for priming. Select the prime button on the touch screen to prime the cartridge. This should only take a few seconds. Take out the adapter/cartridge after priming.

Step 6: Place the adapter/cartridge assembly on the work space. From the top, with your palms, push down as seen in the picture above. This will release the cartridge from the adapter. Return the adapter to the drawer.

Step 7: Place a cork (small white stick) in the fill port as shown above.
Step 8: If the cartridge is a 940, you are done refilling and can move to packaging. If it is an 88 go on to step 9.
Step 9: If the tank is an 88 you will need to replace the chip. DO NOT REPLACE THE CHIP ON THE 940 CARTRIDGE. Start this process by using the multi-tool to extract the old chip. Pry it loose and discard. Make sure that all of the old adhesive is cleaned out. Get a replacement chip for this cartridge and find the chip insertion tool. Be sure to get a correct replacement chip for the color and size you are replacing. The 5 possible chips are labeled HP88M for magenta for instance. A strip of Cyan chips would be labeled HP88C and so on. See picture below and the chart showing which replacement chip belongs on which cartridge.

Find the cutout place on the insertion tool to lay the new chip. The raised black dot will fit into the correct location as seen in the image below. Once the chip is on the tool, take the backing off of the chip with the multi-tool, tweezers, or your fingernail. Make sure the chip is lying flat on the tool before inserting it into the cartridge. Line up the angled face of the tool with the pocket of the cartridge. Insert the chip in the hold moving into the cartridge till the tool is stopped. Bend the tool such that the chip is pressed against the location where you removed the old one. See Pictures below. After chip insertion package as usual.


Move to packaging. We are recommending the use of plastic bags for these cartridges. You’re done!
Thank you,
The RIS Team
Questions? Call 1-888-231-9379 Option 2