Weekly and Monthly Maintenance of the InkCenter™
This list is for store employees not service technicians
Basic maintenance on the inkjet refill system may extend the life of some components and will keep it in good working condition. Unless otherwise suggested these items should be performed weekly, monthly or as needed. Before performing these tasks, hands should be protected with rubber gloves.
Weekly Inkjet Refilling Machine Maintenance Monthly Inkjet Refilling Machine Maintenance
|
|
Prep Station
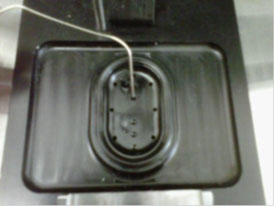
- Always keep drill bit debris away from the prep station(s) to avoid clogging.
- Use a paperclip to clean out the prep station holes. Carefully push paperclip though the small holes on the prep station plate while working the paperclip up and down to loosen debris.
- Points to remember:
- Be sure to clean all 10 holes in the prep station.
- The 4 corner holes are angled in towards the middle.
- The paperclip should go in about ¾ of an inch.
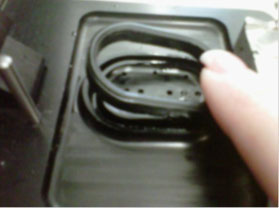
- Using fingers to remove the oval rubber seal on adapter plate; rinse the seal with warm water. Clean inside the track which held the seal. Dry the seal and rotate it 180 degrees before pressing it back onto the track.
Fill Station
- Adapter Plate — Remove the 2 screws holding the adapter plate. Soak rubber mount in water for several minutes and use an ‘old’ rag or paper towel to clean excess ink sludge from mount. Using a spray or pump bottle, saturate area under the mount with water or inkjet cleaning fluid. NO OTHER LIQUIDS SHOULD BE USED. Use the vacuum wand to remove excess fluid. Repeat saturation steps until clean. Replace rubber seal and affix plate with screws.
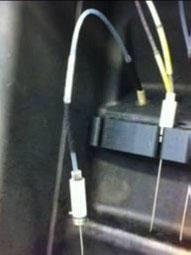
- Injectors — Clean and finger-tighten all injectors; twist brown fittings clockwise on both ends of tubing to tighten.
- Door and surfaces — Clean fill chamber surfaces and plastic door with specialty wipes to remove ink stains. Note: the chamber door should be cleaned more frequently as the ink can damage the plastic cover over time.
Interconnect Board
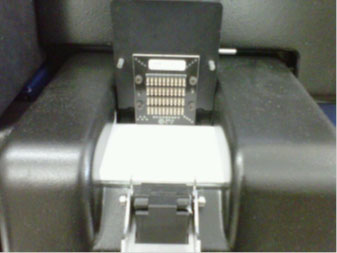
Use inkjet specialty wipes to lightly clean the interconnect board on the test station. Be sure not to push in any pins and call Technical Support at 1-888-231-8379 opt#3 if any broken or stuck pins are discovered.
Vacuum Wand and Waste Separator
Periodically ink sludge may thicken affecting the strength of the vacuum waste separator. Rinsing the ink sludge can lessen its impact on associated functions.
- First complete all cartridge processing before performing the following tasks.
- Open drain valve so that existing waste will be drained from system.
- When complete, close the drain valve.
- Fill a 1-2 quart container with HOT water. Ideally the container should have a wide opening to allow insertion of the vacuum wand.
- Enable the vacuum wand; continue to intake the HOT water through vacuum wand until the system triggers “waste drain.” Depending on the size of the container, this should take no more than a minute.
- Open drain valve so that the hot water/ink sludge/waste will be drained from system.
- When complete, close the drain valve, disable the wand, and return items (wand, lid, and container) to their proper locations.
- Repeat once more if time permits.
Test Adapters Drawer
- NEVER immerse test adapters in water. ONLY use specialty wipes to clean printed circuits on the front and back of adapter. Note that cleaning with a specialty wipe should be done after each and every use.
- Remove drawer foam insert; clean with soap and water; let dry overnight
Refill Adapters Drawer
- Remove adapters and rinse them with warm water; let dry overnight. Clean as frequently as needed for cartridge overflows.
- Remove drawer foam insert and clean with soap and water; let dry overnight
HP02 Vent Covers – Clean the injector portion with a specialty wipe after each use.
Supplies Drawer – Remove supplies and clean with specialty wipes if stained. Pull out foam insert and rinse with soap and water. Replace all items.
Stainless Steel Counter / Maintenance Drawer / Ink Drawers – Use air cans to help blow away dust. Use specialty wipes to remove stubborn ink stains; otherwise, wipe surfaces with an ‘old’ damp soft cloth.
Touch screen display – Use a specialty wipe to remove ink and finger smudges
Outside Cabinet Surfaces / Drawer Handles – Use specialty wipes to remove stubborn ink stains; otherwise, wipe surfaces with an ‘old’ damp soft cloth.
Rear Fan Vents – Use a damp soft cloth to clean the vents.
Other - Please report any fluid leaks found while performing above tasks to Technical Support at 1-888-231-9379 opt #3


